Building a Mau5head | An “Art School” Method
Monday | November 7, 2011
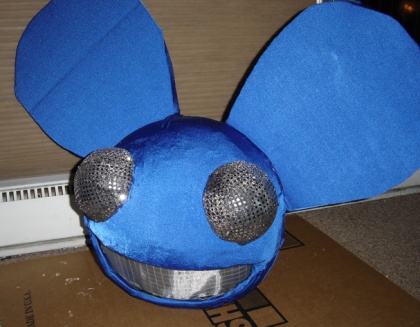
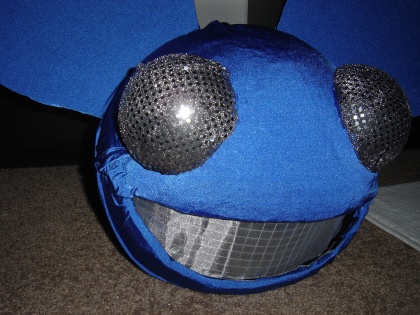
As promised in this post – here is my experience in building a Deadmau5 head for Halloween.
This was a very ambitious project as I never built anything that had to look a specific way. I’ve never done anything this crazy for a costume and usually end up digging through my closet or buying one last minute from a thrift shop. I think the reason for building one this year, besides the fact that I TOTALLY loved Deadmau5 at Lollapalooza, was just to see if I could do it. I was kinda bored and up for a challenge.
I don’t claim to be an expert builder, so if this first head is a little rough around the edges, that’s why. It was one big experiment that I’m actually quite proud of.
If you’re planning on creating a Deadmau5 head, even if you choose not to use the method I did, I hope you’ll find some parts of this useful.
—
For the uninformed – who is Deadmau5?
Since this is my all-things-design blog, I realize some of you might need some context. The Mau5head I’m referring to is a giant mouse head worn by DJ (or producer? digital musician? whatever) Deadmau5.
As to why he wears a mouse head – I suppose you’d have to ask him?
—
Why I call this an “Art School” Method
I refer to it as this because the materials I used in the head are all things I used in college. Hooray!
Basically, while I was searching for different ways to build a Mau5head, I found that all of them required some sort of power tool I a) didn’t have, b) didn’t want to purchase just for one project and c) even if I DID buy one of these tools, I wouldn’t be able to work on my head from my tiny studio apartment. So – I pulled a lot of different pieces from instructions I found and came up with a way I could make a head without using any powertools at all.
This means literally anyone can make a Deadmau5 head.
—
What are the benefits of making a head this way?
I think the one benefit of making your head with plaster bandages or paper mache is that it’s kind of flexible. You have some dry time to bend/cut/smooth away any major mistakes. That’s my opinion anyway.
—
Tried & true methods I learned from
I can’t take all the credit for the techniques I used, so here is a quick list of other ways to make your Deadmau5 head. A serious THANK YOU to all these creators:
-
How to make DEADMAU5 head with LIGHTS and EQUALIZER – I got most of my techniques from this video. Especially the way he made the head over a bouncy ball & made the core for the ears.
-
Making a Deadmau5 Head – Walkthrough – Read through this and it looks like a spectacular walk-through if you have the time to gather the mats and have the tools he’s talking about.
- How to build your own Deadmau5 mouse head helmet! – There are plenty of Mau5head instructions on Instructables – but I found this one to be the most detailed and had the best-looking results. This tutorial is especially great when it comes to wrapping the head, which I can assure you is a pain.
—
Total time to completion
This method requires some drying time – so I’d leave yourself a good 4 or 5 days (depending on your hurry) to get your head completed.
—
Materials and Approximate Prices
A simple list of mats. I had some of these things already (like the mixing bowl and cardboard) but other things had to be purchased. My total purchased estimate is below.
Note: None of these materials were purchased on-line. You should be able to find most if not all of these things cheaper on Amazon/Ebay if you give yourself enough time.
- 2 x White Styrofoam 1x6x12 inch block
- 2 x package of Plaster Bandages
- Super 77 Spray Adhesive
- Glue Gun
- 1 pack 12 Glue Sticks (Seriously, you’ll need at least 1 pack of 12)
- Hard Hat
- 1 Roll Aluminum Screen, thick gauge
- Bouncy Ball (14″ diameter!!)
- All-purpose Tacky Glue
- Gorilla Tape (EXPENSIVE but the most used thing during this build, try not to substitute it)
- 2+ x Threaded Rods
- 2+ x nuts for the Threaded Rods
- Cardboard
- Fabric (all in – ~3 yards shiny blue for the head, ~1/4 yard for the mouth, ~1/4 yard for the eyes. This will give you a lot of extra which I’m glad I had when I messed up the 1st head wrap)
- 2 x ~4 1/2 inch half-globes of floral foam
- A new wire cutter
- Sharpies
- 1 roll black electrical tape
- 1 bucket (preferably that you can fit your head into)
- 1 additional mixing bowl of some sort
- Measuring tape (the more flexible the better – sewing measuring tape would probably be best)
My grand total – ~$110.00 (yikes!)
Don’t worry, though! Subtract the things you might already have/can borrow (wire cutters, glue gun, electrical tape), things you can find online for cheap (foam, wire, a hard hat), and things you can definitely buy for cheaper (discount fabric is a good idea!) you can still build using this method for somewhere around ~$70.00
—
Lights (or lack thereof)
Deadmau5 heads look REALLY cool all lit up with LEDs and EL wire but – as you can see above – I went a bit over budget and decided to scrap the light-up idea.
Also, since this was my first time building with plaster bandages sans wire armature, I was afraid touch lamps would be too heavy for the shell. This is not true – learn from my lack of LEDs. Simply sub the half balls of floral foam for some cheap touch lamps and you have lights for roughly the same cost!
If you really want to go all out and get some sick results – line the head with EL wire. Check out this guy who was behind me at Lolla:
In my opinion, you get the best results with EL wire when you simply line the head with it.
Check out this site for more information: That’s Cool Wire!
Check out Amazon if you’re looking to purchase (they seem to be quite a bit cheaper) : Amazon!
—
The dimensions
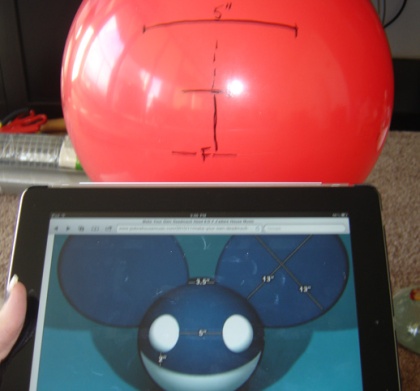
Something I learned is that it doesn’t really matter if you have a few seams or a little bit of glue showing as long as you head doesn’t look derpy. How do you prevent a derpy looking head? With these diagrams posted by Deadmau5 himself to Facebook!
GO HERE FOR DIMENSIONS (super, super important!!!)
Definitely have these printed out (or on some screen-type device) any time you’re measuring things. Even if you’re one one of the last steps (like gluing eyes) take a peak to avoid the derp.
—
The build
Here are my build photos and the steps I took to create the head. Some of the steps don’t really have during photos, but I tried to at least get one after each step was complete.
Step 0 – Hard hat prep (optional?)
Before I even got all the mats to my apartment, I did have a bit of help in hacksawing off the brim of the hard hat. Fear not if you don’t have access to anyone with a hacksaw! Upon later review, the hard hat probably could have fit with the brim in-tact.
Step 1 – Mapping dimensions onto your bouncy ball
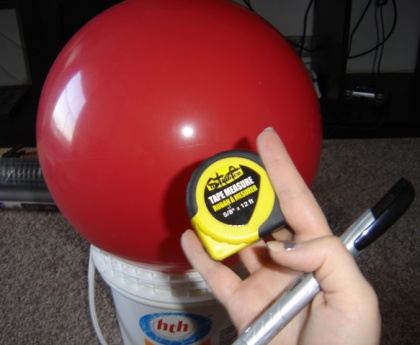
Place your 14″ diameter bouncy ball in a bucket so it won’t bounce away while you map out the dimensions. Have the bucket be one you can fit over your head, so you can trace where the mask opening should be.
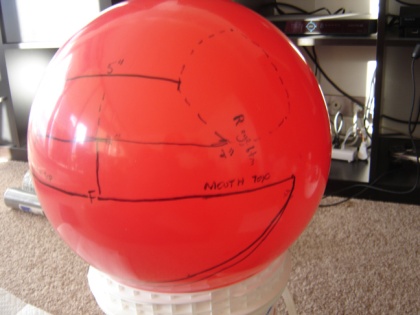
Have those dimensions handy! Start drawing them directly onto your bouncy ball. The angles for the mouth were kind of tricky, so try your best to get them on there.
Note: Make your mouth bigger rather than smaller ESPECIALLY if you plan on wearing it to a show.
Step 2 – Cover the ball in plaster bandages
This is where you’ll start to require some drying time.
Choose which half you’re going to plaster first. In my case, I did the back half first. I placed the bouncy ball face-half down into my extra red mixing bowl. The I used the bucket to wet my plaster bandages, and covered approx. 1/2 the ball.
The plaster begins to harden within 5-10 minutes, but I let each half dry for a day while I was at work.
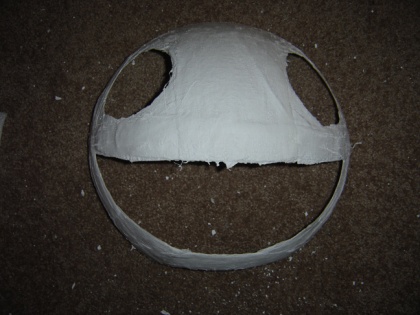
Once dry, trace the edge of your first half with a sharpie before popping it off. Then, plaster around that edge and drawings of the mouth and eyes (I suppose you really don’t need to leave the eyes open if you’re not planning on adding LEDs – but I liked the option). If you’re going to add LEDs/touch lamps for eyes, I’d make the eyes bigger than the dimensions suggest. You’re probably going to want to pop them in from the underside – rather than glue them on the surface.
I left it to dry for another day before popping the second half off.
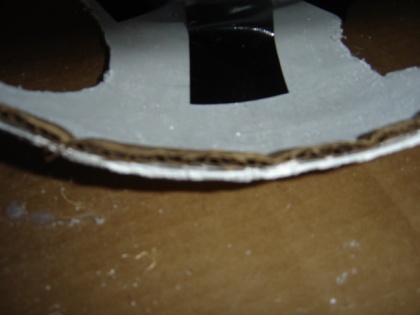
Do not be afraid to lay the plaster on thick – I ended up needing to pop the back half on the form again and add more plaster. I was afraid that the head would get too heavy, but this is not the case with just 3-4 layers of bandage. Remember, this shell will need to support the ears at the very least and should be especially thick if you decide to add touch lamps for eyes.
Note: You could also choose to cover the ball completely in one shot and then pop the bouncy ball/beach ball. I wasn’t 100% confident I wouldn’t be needing the form again, hence the two halves. YMMV.
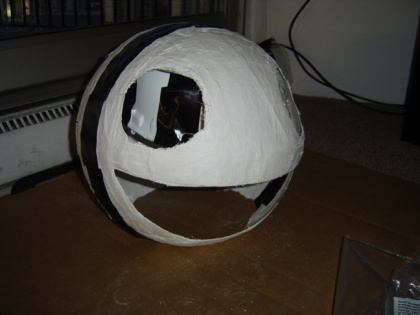
Step 3 – Joining the halves
Prop up the head in your mixing bowl. It’s okay if they don’t join perfectly, hot glue & Gorilla Tape will fix it.
To get a good seal I first went around the outside of the head with tape then the inside seam with glue.
Step 4 – Ear construction
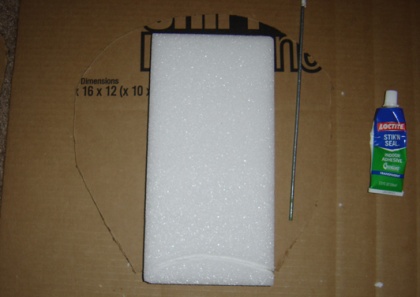
For this method of making the ears, cut 4 identical ear shapes out of cardboard.
Note: Try your best to get pieces with NO bends. I thought it wouldn’t show through the fabric wrap, but it did a little bit.
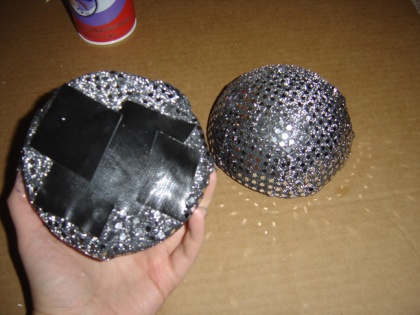
Grab one of those pieces of foam and one ear piece. Use a box cutter/xacto knife to cut along the contour of the bottom of the ear. This will give more surface area for hot glue when it comes time. Stick a threaded rod through the foam length-wise so it leaves about 1 1/2-2 inches hanging out. Line your foam back up with your ear and glue it down. Take another ear piece and glue it as well. I waited until after the ear was wrapped to glue the threaded rod into the ear, but you can probably do it now.
Note: If you can stick more threaded rods through the foam without compromising it’s integrity – do it. Or use wood instead of foam. Honestly, the more supports the better.
Step 5 – Eye wrapping
Grab your eye fabric and wrap & cut down the fabric until you have just enough to cover it without to much overlap. If it’s a square, cut little 2-3 inch slits in the middle of each side so you can fold it easier. When you’re sure you have the right amount – use your spray adhesive (in a well ventilated area – seriously. I was in front of my wide-open patio door whenever I was using this stuff) and cover the eyes.
I added some more Gorilla tape to the back because I friggin love Gorilla tape!
Step 6 – Ear wrapping
Note: Wrapping the pieces in fabric was, for whatever reason, not my strongest suit. Please read through some of the other instructions mentioned above for pointers.
I chose to wrap my ears so that the back side would have a little bit of a seam, but the front would be virtually seamless. Basically you choose your front side, cut enough fabric so it overlaps over the edges and onto the back. Spray adhesive it down. Then, you cut another piece for the back that is the same size as the ear with no overlap. Use this piece to cover the back side and any edges you might have.
I haven’t quite glued the threaded rods into the ears at this point (I wanted to wait until I had the helmet in) – but I did roughly measure where each ear would go, and labeled each ear as left or right.
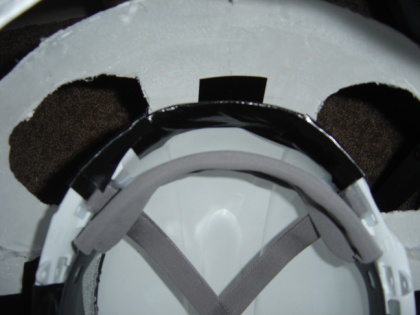
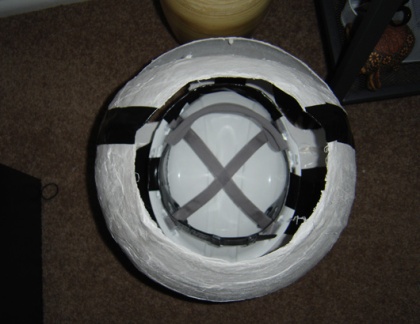
Step 7 – Adding the Hard Hat
Note: Before using any glue – spend plenty of time making sure you get the hard hat where you want it in the head. Do this using a mirror and some regular duct tape to hold the hard hat in place.
There isn’t a really good explanation for this step besides lots and lots of glue. I also let the head dry for a day before adding anything else.
Step 8 – Insert lip/Add holes for the ears
In order to get the right depth into the mouth – you need to add a 1/4″ lip. I did this by cutting cardboard strips about 1″ wide and as long as each lip. I then glued them in layers until (I think I only needed 1 layer – have your measuring tape handy!) they were 1/4″ thick.
This is also the point where you want to double check your ear/threaded rod placement and make holes for the rods in the head. All I needed to do this was a thick nail and a hammer. It’s important you do this before covering the head – I’ve heard you can have nasty snagging issues with your fabric if you wait.
Now I finally glued the rods into the ears.
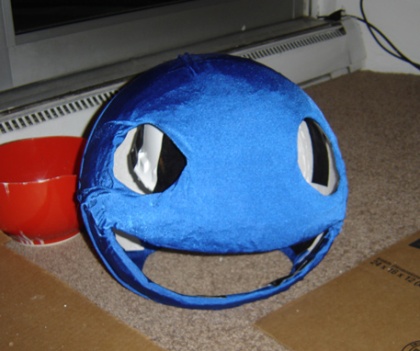
Step 9 – Wrapping the head
Note: I’ve mentioned it before but PLEASE PLEASE read these instructions on wrapping your head. I did and I still managed to mess up my first attempt on the wrap.
Have your spray adhesive, tacky glue, and glue gun ready. Use the spray adhesive sparingly. If you know you’re going to have wonky seams, get them on the back side of the head.
A little bit of work later…
…It’s wrapped! Magic!
Note: I decided not to go with touch lamps, but if you did, this is probably the point where you’d want to slip them into the sockets from the underside (It’s a good thing I didn’t do the touch lamps – my eye sockets where way too small)
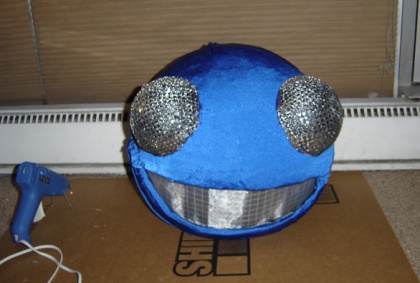
Step 10 – Adding the mouth
I wish I had better picture of this. I cut out an approximate rectangle from my roll of mesh. Then, I traced out the mouth shape with sharpie by putting a little line on each wire I needed to cut. Once that piece was cut out, I wrapped my veil fabric over the front and secured the veil to the mesh with lots of tape. From there it was lots of hot glue and tape on the inside.
Step 11 – Attaching eyes
Pretty much as easy as it sounds. If your head doesn’t have eye sockets – get as much hot glue on there as possible. Since mine did, I got as much contact as I could between the eyes and the edge of the sockets. Then, I used more tape from the inside of the head.
Step 12 – Attaching ears
Find the holes you made before you covered the head in fabric. Poke through the fabric with just a nail. Get a little bit of hot glue on the head and put a TON on the ear foam. Stick the threaded rod through the hole and hold it there. Once the glue is dry, don’t forget to screw it tight with a nut.
Note: If you only used one threaded rod per ear like I did, get ready to load up on hot glue. Use enough and it will hold, believe me – this head made it through three parties this year!
Step 13 – Finishing touches
Congratulations! Your head is mostly complete. I suppose it’s up to you but I definitely needed to add the X’s over the eyes.
—
The completed Mau5head
So that is that. Despite some shifts in the eyes and ears during glue drying – I avoided making a Derpmau5 pretty well.
People who recognized it absolutely loved it – and I got a bunch of “hey cool”s from people who didn’t. It was a ton of fun to wear and take pictures in, too.
I think I’ll probably make another one before a show (SADLY this one wasn’t ready in time for the show on 10/22 – BUMMER) and I plan to improve upon the first (LEDs EVERYWHERE!).
—
More later!















Monday | May 25, 2015 at 11:41 am
[…] then I’ve posted how to make a Deadmau5 head with no power tools & very little space, countless Creative Commons photos, and design projects showing progression to finished […]
Saturday | May 26, 2012 at 1:21 pm
[…] blog. Since then I’ve posted a whole ton of creative commons licensed snapshots, finished a few projects, and generally wrote about all things design. Here’s to another year (and actually […]
Wednesday | January 18, 2012 at 11:21 pm
[…] there’s one thing I am proud of this fall – it’s my Mau5head. Go read the instructions here and see more pictures here – NO POWER TOOLS REQUIRED! 10 out of 10 – would build […]
Saturday | December 10, 2011 at 4:10 pm
[…] have been using tags for my Inspiration posts like the one about the Deadmau5 head and the Lollapalooza wrap up – but I want these Snapshots to get more […]